

Harbor Breeze Elms 52-in Brushed Nickel with Gray/Walnut Blades Color-changing Integrated LED Indoor Ceiling Fan with Light and Remote (5-Blade)
- The 52-in Elms in brushed nickel finish blends both elegance and technology, bringing a modern look to any interior space. The brushed nickel finish is accompanied by a crystal themed light kit and 5-reversible blades in gray and walnut finishes. The Elms is equipped with a 6-speed remote control so you can maintain your ideal comfort level and a reversible motor function which allows you to change the direction of your fan from downdraft mode during the summer to updraft mode during the winter. The fan’s integrated LED light kit is fully dimmable, includes adjustable white technology, and delivers up to 900 lumens of light output.
- Brushed nickel ceiling fan from the Elms collection features 5 reversible blades with gray and walnut finishes
- Decorative crystal indoor ceiling fan for large rooms with a dimmable integrated LED light kit
- Includes 6-speed remote control so you can operate the fan and light from anywhere in the room
- Light kit includes adjustable white technology – options to choose from include 2700k, 3000k, 4000k, 5000k or 6500k
- Integrated LED light kit produces up to 900 lumens when set to its highest level
- Mounts to flat or sloped ceilings with 4-in L down rod included
- Manual reverse air flow switch included that allows you to change the fan’s blade direction setting seasonally, so cool air is pushed down or warm air is distributed evenly, reducing energy usage year-round
- 52-In fan provides airflow up to 4500-CFM, making it ideal for large rooms up to 400-sq ft
- Limited lifetime motor warranty and 2-year warranty on all other parts give you peace of mind
$179.00
Harbor Breeze Centreville 42-in Brushed Nickel with Nutmeg/Cocoa Blades LED Indoor Flush Mount Ceiling Fan with Light (5-Blade)
- The Harbor Breeze 42″ Centreville features a brushed nickel finish, 5 reversible blades and 3 arm light kit that includes LED bulbs.
- Low profile design to be mounted flush with the ceiling where more walk-through space is
- Easy to use pull chains are included for quick adjustments to the speed settings and light output
- 3 Arm light kit with marbleized glass includes 3 A15, E26 6.5W LED bulbs
- Brushed nickel finish complements the 5 reversible nutmeg or cocoa ceiling fan blades
- 42-in fan provides airflow up to 2687 CFM, making it ideal for small sized rooms up to 100-sq ft
- Reversible motor efficiently circulates cool air in the summer and warm air in the winter, cutting down on energy costs
- Great for transitional style decor
- Limited lifetime warranty
$74.98
Harbor Breeze Centreville 42-in Oil-Rubbed Bronze with Auburn/Mink Blades LED Indoor Flush Mount Ceiling Fan with Light (5-Blade)
- The Harbor Breeze 42″ Centreville features a brushed nickel finish, 5 reversible blades and 3 arm light kit that includes LED bulbs.
- Low profile design to be mounted flush with the ceiling where more walk-through space is
- Easy to use pull chains are included for quick adjustments to the speed settings and light output
- 3 Arm light kit with marbleized glass includes 3 A15, E26 6.5W LED bulbs
- Oil-rubbed bronze finish complements the 5 reversible auburn or mink ceiling fan blades
- 42-in fan provides airflow up to 2687 CFM, making it ideal for small sized rooms up to 100-sq ft
- Reversible motor efficiently circulates cool air in the summer and warm air in the winter, cutting down on energy costs
- Great for transitional style decor
- Limited lifetime warranty
$74.98
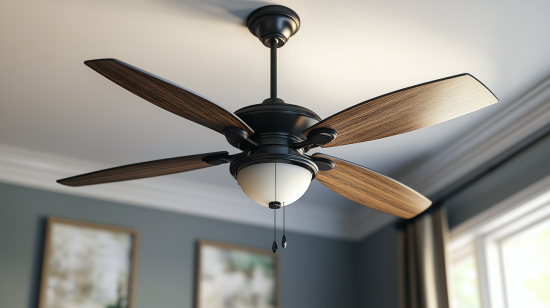
Choosing the right ceiling fan for your home can be an overwhelming process with so many options on the market. As one of the most popular ceiling fan brands, Harbor Breeze offers a wide selection of styles – including ceiling fans with lights to illuminate your space. In this comprehensive buying guide, I’ll walk you through everything you need to know about Harbor Breeze ceiling fans with lights so you can find your perfect match!
How Do I Install Harbor Breeze Ceiling Fans With Lights?
Installing a new Harbor Breeze ceiling fan with lights is a project you can definitely tackle yourself with some basic mechanical skills. Here are the steps:
1. Turn Off Power at the Breaker
Safety first! Make sure to shut off power to the fan wiring at the breaker box before doing any work.
2. Remove the Existing Fan
Take down the old ceiling fan by detaching the mounting bracket and removing wiring connections. Inspect the existing electrical box to make sure it is rated for ceiling fan support.
3. Mount the New Bracket
Attach the mounting bracket that came with your Harbor Breeze fan onto the ceiling junction box according to the provided instructions.
4. Make the Electrical Connections
Connect the black (hot), white (neutral), ground, and any auxiliary wires between the ceiling junction box and the wiring of the Harbor Breeze fan. Make sure all wire nuts are secured tightly.
5. Mount the Motor Housing
Lift the fan motor housing and attach it to the mounting bracket using the provided hardware. Make sure it is secured firmly.
6. Install the Fan Blades
Attach the blades to the motor housing one by one using the blade arms, screws and washers. Follow the diagram in the user manual for proper blade placement.
7. Install the Light Kit
Connect the wiring harnesses between the fan motor housing and the light kit. Attach the glass light shades and bulbs. Mount the light kit onto the bottom of the fan.
8. Finishing Touches
Install fan pull chains, switch housing caps and any other cosmetic accessories. Turn the power back on and test your handy work!
With the right safety precautions and following the included instructions, installing a Harbor Breeze ceiling fan with lights is totally DIY friendly. Just take your time and you’ll be cooled down and illuminated in no time.
What Are the Best Harbor Breeze Ceiling Fans With Lights?
With a wide range of options to choose from, here are 5 of the best Harbor Breeze ceiling fans with lights:
- Harbor Breeze Mazon 44-in Bronze LED Indoor Ceiling Fan – This popular bronze fan has an integrated LED light kit and hand-carved wooden blade design for a timeless look. It’s energy efficient and perfect for mid-sized rooms.
- Harbor Breeze Twin Breeze II 74-in Oil Rubbed Bronze Smart Ceiling Fan – With dual-reversible blades and voice control compatibility, this smart ceiling fan can provide whole-room air circulation and illumination. A great choice for large living spaces.
- Harbor Breeze Merrimack 52-in White Flush Mount Indoor Ceiling Fan – For a clean, modern look, this 52-inch flush mount fan features an LED light and remote control in a glossy white finish. Great for contemporary styles.
- Harbor Breeze Mazon 44-in Brushed Nickel LED Indoor Flush Mount Ceiling Fan – With an integrated 20W LED light kit and flush mount design, this nickel brushed nickel fan can provide both form and function in tight spaces.
- Harbor Breeze Armitage 42-in Oil Rubbed Bronze Indoor Ceiling Fan – Made with a rustic barnwood-style blade design and vintage filament bulbs, this bronze fan adds a unique farmhouse vibe. Perfect for porches or patios.
When choosing your ceiling fan, consider size, finish, blade style, lighting needs, and energy efficiency. Harbor Breeze offers stylish options for every home.
How to Troubleshoot Harbor Breeze Ceiling Fan Lights Not Working?
If the lights on your Harbor Breeze ceiling fan are not turning on, there are a few easy troubleshooting steps to get them working again:
Check Light Bulbs
Make sure the light bulbs are properly installed and not burnt out. Replace bulbs if needed with the same type and wattage.
Test the Light Switch
Use the pull chain to ensure the light switch itself is actually turned on. Toggle the switch a few times.
Check Electrical Connections
Inspect the wiring connections between the fan motor housing and light fixture. Look for any loose wire nuts and make sure wires are making proper contact.
Check for Power Flow
Test with a multi-meter or voltage pen to confirm power is actually flowing to the light fixture when switched on. If not, check the connections at the breaker panel.
Replace Light Kit
If the lights still won’t work after checking bulbs, switches, and wiring, you may need to replace the entire integrated LED light kit. Kits are often sold separately by model number.
Reset Circuit Breaker
As a last resort, turn off power at the breaker and give it a reset by flipping the switch to “Off” and back to “On”.
With consistent light bulb replacement and periodic cleaning of fan components, Harbor Breeze ceiling fan lights can provide long-lasting illumination without issues. But when troubles pop up, a few simple troubleshooting steps should get your lights shining again.
Where Can I Buy Harbor Breeze Ceiling Fans With Lights?
Harbor Breeze ceiling fans with integrated lights can be purchased easily both online and in-store from the following go-to retailers:
- Lowe’s – As the exclusive retailer of Harbor Breeze products, Lowe’s has a huge selection of ceiling fans both online and in stores across the country. You can often catch great sales too.
- Amazon – Search Harbor Breeze ceiling fans on Amazon for competitive pricing and fast shipping. Watch for deals offered by authorized resellers.
- Home Depot – While not an authorized retailer, you can sometimes find Harbor Breeze ceiling fans sold by third parties on HomeDepot.com. Inventory is limited compared to Lowe’s.
- Costco – Check for Harbor Breeze ceiling fans at your local Costco warehouse. Selection varies by location. Prices are discounted when purchased in-store.
- Wayfair – Harbor Breeze ceiling fans can be shipped directly to your home when ordering through Wayfair.com. Access to hard-to-find models.
- Overstock – Search Overstock.com for Harbor Breeze ceiling fan deals. Limited styles available but often low prices.
- Harbor Breeze website – While no direct sales, the HarborBreeze.com website can help locate local retailers or online shops carrying specific fan models.
Be sure to compare prices between retailers and take advantage of any sales, coupons or rebates when buying your Harbor Breeze ceiling fan with lights.
How to Replace Light Bulbs in Harbor Breeze Ceiling Fans?
It’s easy to replace spent light bulbs in your Harbor Breeze ceiling fan. Follow these quick steps:
- Turn off the power to the ceiling fan.
- Remove the glass shade from the light fixture. This may require unscrewing a finial or twisting the glass counterclockwise.
- Identify the type of bulb needed. Check the wattage and shape indicated on the old bulb. LED, incandescent, and halogen are common.
- Gently remove the old bulb by grasping and pulling it straight outward. Do not twist.
- Align the contact points of the new bulb and insert directly into the light fixture socket. Do not force.
- If needed, reconnect any wiring harness plugs that were detached when removing the old bulb.
- Replace the glass shade and any other decorative components like metal trim.
- Restore power and test the operation of the new bulb using the pull chain.
Be sure to replace all the bulbs at once so the lighting color remains consistent. And never exceed the recommended wattage! Adding a little lubricant to the light socket can make periodic bulb changes easier.
What is the Warranty on Harbor Breeze Ceiling Fans With Lights?
Harbor Breeze ceiling fans purchased within the United States come with a lifetime limited warranty that covers the fan motor and certain defects. Here are the key specifics on the coverage:
- Motor – Lifetime warranty covers defects in workmanship and materials for the fan motor and its operation.
- Light Kits – 1 year limited warranty covers light kits, including LED components and glassware.
- Blades – Blades are covered under the defects warranty for 1 year after purchase.
- Accessories – Pull chains, remotes, wall controls and other accessories are covered for 1 year.
- Labor – No warranty coverage is provided for labor costs for install, repair or replacement.
- Finish – The finish of fans is not covered under the warranty for chipping, cracking, or weathering.
- Proof of Purchase – You must be able to verify date and location of purchase for a valid warranty claim.
Overall, Harbor Breeze stands behind their ceiling fan motors for lifetime use. But finish flaws, minor parts, and labor are up to the owner. Be sure to keep your receipt!
How to Wire Harbor Breeze Ceiling Fans With Lights?
Here are the key steps to wire both the fan and light kit on a Harbor Breeze ceiling fan properly:
- Turn off power at the breaker. Verify power is off.
- Connect the green grounding wire from the ceiling to the green/bare wire from the fan. Twist wire connector until tight.
- Connect the white (neutral) wire from the ceiling to both the white wire from the fan and the white wire from the light.
- Connect the black (hot) wire from the ceiling to the black wire from the fan and the black wire from the light.
- Optional – Connect the blue wire from the fan to the black (hot) wire if using a ceiling fan wall controller.
- Optional – Connect the red wire from the light to the fan’s black (hot) wire if using separate light switches.
- Tuck wires into the junction box neatly and reattach the fan’s mounting bracket.
- Install fan blades, light kit and any covers. Turn power back on when complete.
The key is connecting the neutral whites together, the ground greens together, and separating the fan and light blacks to control them independently. Follow diagrams closely for smooth wiring.
Can I Use LED Bulbs in Harbor Breeze Ceiling Fans With Lights?
The good news is YES – you absolutely can use LED light bulbs in Harbor Breeze ceiling fan light kits and fixtures! Here are some tips:
- Check your fan manual for the maximum recommended wattage for the light fixture. Stay at or under it.
- Choose replacement LED bulbs that match the shape/style of the original incandescent bulbs. A19, G25, BR styles are common.
- Go with dimmable LEDs bulbs if you want to control brightness with a wall dimmer or remote.
- Stick with name brands like GE, Philips, or Cree for quality and long life.
- Know that higher lumens (800+) produce the brightest light. Go lower (400-600) for softer ambiance.
- Expect to pay $5-$15 per LED bulb, but save on energy costs long-term.
With their energy efficiency, cool operation, and longevity, LED bulbs are perfect replacements for outdated incandescent bulbs in Harbor Breeze ceiling fans. Just be sure to choose the right size, shape and brightness when upgrading.
How to Clean Harbor Breeze Ceiling Fans With Lights?
Regular cleaning keeps your Harbor Breeze ceiling fan looking its best. Here are tips to properly clean the fan blades, motor housing, light fixture and glass:
- Turn off power to the fan before cleaning for safety.
- Use soft brushes or microfiber cloths to remove dust buildup on blades. Vacuum gently between blades.
- Mix mild soap and water. Dampen cloth to wipe down fan motor, switch housing and hardware. Dry completely.
- Check bulb connections. Remove globe/shade and wash gently with mild detergent if needed. Never immerse in water!
- For caked on dirt, try a small amount of mineral spirits on a cloth. Test on small area first.
- Set glass shades on towels to air dry before reassembling fixture.
- Replace any chipped or cracked glass. Check bulbs and replace if needed.
- Use compressed air or a small vacuum crevice tool to remove debris from hard-to-reach spots.
- Apply a metal polish paste to restore shine on brushed nickel, chrome or brass finishes if desired.
With regular dry dusting and periodic deep cleaning, your Harbor Breeze fan will keep circulating air and providing illumination while looking like new.
What are the Most Energy-Efficient Harbor Breeze Ceiling Fans With Lights?
When selecting a ceiling fan with lighting, you’ll want to look for models with these energy-saving features:
- DC motor – Fans with electronically commutated DC motors use significantly less energy than standard AC motor models.
- Energy Star rating – Ceiling fans certified under the Energy Star program meet strict efficiency guidelines.
- LED lighting – Choose a fan with integrated LED light kits which use a fraction of the power of incandescent bulbs.
- Timer or occupancy sensor – Fans with automated shutoff save power.
- Higher blade spans – Larger blade spans like 52″-60″ optimize air movement at lower speeds.
Some great energy-efficient options from Harbor Breeze include:
- Sea Air 44-in DC Brushed Nickel Ceiling Fan
- Mazon 44-in DC Matte Silver Flush Mount Fan
- Twin Breeze II 74-in Oil Rubbed Bronze Smart Fan
- SoundWave 52-in White Ceiling Fan
Investing in a high-efficiency Harbor Breeze ceiling fan can provide comfort and ambiance while also minimizing energy usage and saving you money over years of operation.
How to Remove Lights From Harbor Breeze Ceiling Fans?
Follow these steps to remove the light kit from a Harbor Breeze ceiling fan:
- Turn off power to the fan at the circuit breaker.
- Remove the glass light shade or globe by unscrewing it from the metal frame or unsnapping any clips.
- Find the wire connectors that join the wires between the fan and the light fixture. Carefully unscrew them.
- Locate the mounting screws that hold the light kit onto the fan assembly. There are typically two screws.
- Supporting the light fixture with one hand, remove the mounting screws to detach the light assembly from the fan.
- Remove the entire light kit and place it in a secure spot.
- Install a non-light ceiling fan blade cover in place of the light kit using included screws.
- Seal up any exposed wiring with wire nuts and electrical tape so no bare wire is visible.
- Turn circuit breaker back on and test fan operation without the light kit installed.
With the wiring properly capped off and blade covers installed, you can safely operate the Harbor Breeze ceiling fan without the light kit. Keep all original parts in case you want to reinstall it later on.
How to Fix Flickering Lights in Harbor Breeze Ceiling Fans?
If the lights on your Harbor Breeze ceiling fan are flickering, try these troubleshooting tips:
- Inspect all light bulbs and replace any that are faulty, have filament damage or are close to end of life.
- Check for loose light bulb sockets that don’t hold bulbs firmly in the contact points. Tighten socket screws or replace faulty sockets.
- Make sure wire connections at the light fixture are not loose. Tighten all wire nuts and connectors.
- Test for faulty wall switch or circuit issues that cause power to intermittently cut out to the fan and lights.
- Clean all electrical contacts including at bulbs, sockets and wiring connections to clear out corrosion.
- If using LED bulbs, swap them for incandescent bulbs to see if flickering stops. Some LEDs can have connection issues.
- Make sure the ceiling fan light kit is compatible with any dimmer controls being used which could cause flickering.
- As a last resort, replace the entire light kit if it’s outdated or constantly causing issues.
With persistence, testing and a systematic process of elimination, you should be able to resolve annoying flickering ceiling fan lights.
Are Harbor Breeze Ceiling Fans With Lights Good for Outdoor Use?
Harbor Breeze does make select ceiling fan models that are specially designed and rated for exterior use:
- Damp rating – Outdoor fans should be IP44 or IP55 damp rated to withstand moisture.
- UL wet listed – Fans are certified safe to use in covered outdoor locations when wet listed.
- Rust-resistant – Blades and hardware will be constructed from materials that resist corrosion.
- Finishes – Look for powdercoated, galvanized or high grade polyurethane finishes.
- Lighting – Outdoor fan lights need water-tight LED fixtures with weatherproof gaskets.
Some great outdoor options are:
- The Kemah 48-in wet-rated ceiling fan for patios
- The 60-in Seaside alley-brushed steel fan for decks
- The Santa Ana 52-in damp rated fan for porches
Make sure any wiring is run properly for outdoor installation. Using a GFI circuit is recommended for safety. And check local electrical codes for requirements.
How Do I Dim the Lights on Harbor Breeze Ceiling Fans?
To control the brightness of the lights on your Harbor Breeze ceiling fan, you have a couple options:
- Use a compatible dimmer switch – Install a dimmer switch specifically designed for ceiling fan lights on the wall switch that controls the lights. Test for buzzing.
- Install a remote control – Many Harbor Breeze fans support remote controls or wall units that allow you to dim the lights remotely.
- Swap bulbs – Replace standard bulbs with dimmable LED bulbs that will work with a dimmer switch.
- Add a Lutron fan control – Lutron systems like the Maestro LED dimmer provide full fan and light dimming from one unit.
- Adjust number of bulbs – If your light kit takes multiple bulbs, remove some to lower the overall brightness.
- Add a smart hub – Smart home hubs allow app and voice control of brightness when connected to smart fan control modules.
With the right components, you can easily control the right mood lighting on your Harbor Breeze ceiling fan. Just take electrical compatibility into account.
What is the Average Lifespan of Harbor Breeze Ceiling Fans With Lights?
The average life expectancy for Harbor Breeze ceiling fans ranges from 10-17 years for normal residential use according to the brand’s warranties. Here’s the breakdown:
- Motor – Fan motors are warrantied for lifetime under defect and workmanship, equal to 17 years average use before possible wear issues.
- Blades – Well constructed fan blades typically do not degrade and instead last the lifetime of the fan.
- Lights – Integrated LED lighting kits last 50,000 hours on average – over a decade with normal use before replacement needed.
- Parts – Accessory parts like remote controls, chains and switches last approximately 10 years before wear and age related replacement.
- Finish – Painted and plated finishes may show fading and wear at around the 10 year mark on average.
- Maintenance – Regular cleaning and periodic motor lubrication can maximize the lifespan of all components.
Considering Harbor Breeze ceiling fans carry leading warranties, have readily available replacement parts, and are designed for years of performance, under normal circumstances they should easily provide illumination and comfort for your home for over a decade when properly maintained.
How to Choose the Right Harbor Breeze Ceiling Fan With Lights for My Room?
Here are the key factors to consider when selecting the perfect Harbor Breeze ceiling fan with lights for a room in your home:
- Size of the room – Measure square footage and height to ensure you choose an appropriately scaled fan for proper air movement.
- Ceiling height – Fans should be 10-15″ from ceiling to blades for ideal operation. Factor in height.
- Amount of light – Assess lighting needs and choose a fan with enough bulbs and wattage. Have an electrician add fixtures if needed.
- Style of room – Match the style like modern, rustic, industrial to the room. Blade, finish and light choices all impact look.
- Color scheme – Choose finish colors and blade woods that coordinate. Mixing metals like brass accents work well.
- Features needed – Do you want smart, remote-controlled, or reversible options? Have adequate ceiling support?
- Noise level – Larger fans can be louder. If the room is a bedroom, look for whisper-quiet DC motor fans.
Take measurements, assess the decor, and consider the practical needs of the space. This makes choosing the perfect Harbor Breeze ceiling fan with lighting quick and easy!
Are Harbor Breeze Ceiling Fans With Lights Compatible With Remote Controls?
Many Harbor Breeze ceiling fan models do offer remote control capability for convenient control of both fan speeds and light dimming. Here are some tips for compatibility:
- Look for fans labeled remote control adaptable – These have built-in receivers to pair with the remotes.
- Choose a matched remote designed for your fan – Remotes are often model specific. Confirm compatibility.
- Make sure your wiring supports remote function – The fan should have a separate wire connection for the light and fan.
- Check that the remote is compatible with any fan-specific features – Such as reversible motors or timer functions.
- Ensure unobstructed signal between remote and fan. Remotes have a 20-30 foot effective range.
- Install a remote receiver if needed – Older fans can be upgraded with universal receivers.
- Replace battery regularly – Remotes won’t work properly with a dead battery.
With a compatible Harbor Breeze ceiling fan and remote matched set, you can conveniently control fan speeds, dimming, timers, and more from the comfort of your chair!
How Do I Find the Model Number on Harbor Breeze Ceiling Fans With Lights?
Locating the model number on your Harbor Breeze ceiling fan allows you to identify the version you have for maintenance,troubleshooting and replacement parts. Here are the places to look:
- Inside the battery compartment of the remote control (if equipped).
- On the small rating sticker inside the ceiling canopy once removed.
- Inside the switch housing mounted to the motor. May be on side or underside.
- On the fan blade iron – remove a blade and look at the internal frame piece that attaches to the motor.
- On the printed instructions included inside the fan’s box.
- Within the barcode UPC label on the fan’s packaging.
- On your original purchase receipt.
The model number will generally be a letter prefix followed by a series of digits. For example, Merrimack would be “BY52RR091”. Capturing the full number is key for identifying the specifics of your fan.
If needed, you can then reference the model number online to download manuals or shop for replacement parts to keep your Harbor Breeze ceiling fan performing for years of operation.
What Tools Are Needed for Installing Harbor Breeze Ceiling Fans With Lights?
Installing a new Harbor Breeze ceiling fan with integrated lights is an achievable DIY project with this essential toolkit:
- Phillips screwdriver – For attaching mounting brackets and component assemblies. Have multiple sizes on hand.
- Electrical tape – For capping wires and connections during wiring.
- Wire cutters/strippers – For preparing wires to connect ceiling and fan/light wiring.
- Voltage pen – For safely testing that power is off before working.
- Wiring pliers or channel locks – Helpful for securing wire nuts and connections tightly.
- Step ladder – Provides safe access to the ceiling junction box and fan.
- Circuit tester – For confirming correct wiring before restoring ceiling fan power.
- Stud finder – Ensures you have solid structural framing for heavy duty support.
Having these basic DIY electrical and installation tools will give you everything needed to successfully install Harbor Breeze ceiling fans with integrated lighting kits safely and with proper connections.
How to Balance Harbor Breeze Ceiling Fans With Lights?
If your Harbor Breeze fan starts to wobble, gets noisy or rotates unevenly, a balancing adjustment is needed. Here are the steps:
- Turn the fan off and let blades fully stop.
- Carefully clean each fan blade from base to tip to remove dust buildup.
- Check blade angles – realign any blades that may have shifted out of position if arms are loose.
- Identify heaviest blade by comparing weights. Use a balancing kit or small strips of electrical tape to weight the lighter blade tips.
- Run the fan on low speed and watch for wobble. Continue to add balancing weights and adjusting blades until even rotation is achieved.
- Verify blades are seated and screwed tightly into their attachments slots.
- Make sure the fan mounting bracket is securely fastened with no play.
- Tighten the canopy and motor assembly screws to reduce chance of vibrations.
- Replace blades or motor if balancing attempts still fail after adjustments above.
Take the time to properly balance and align blades as the fan seasons and settles. The results will be smooth ceiling fan operation for optimal air circulation and comfort.